Front Of Center Outsert System (Patent#US10203185)
Quantity per pack 12 Each
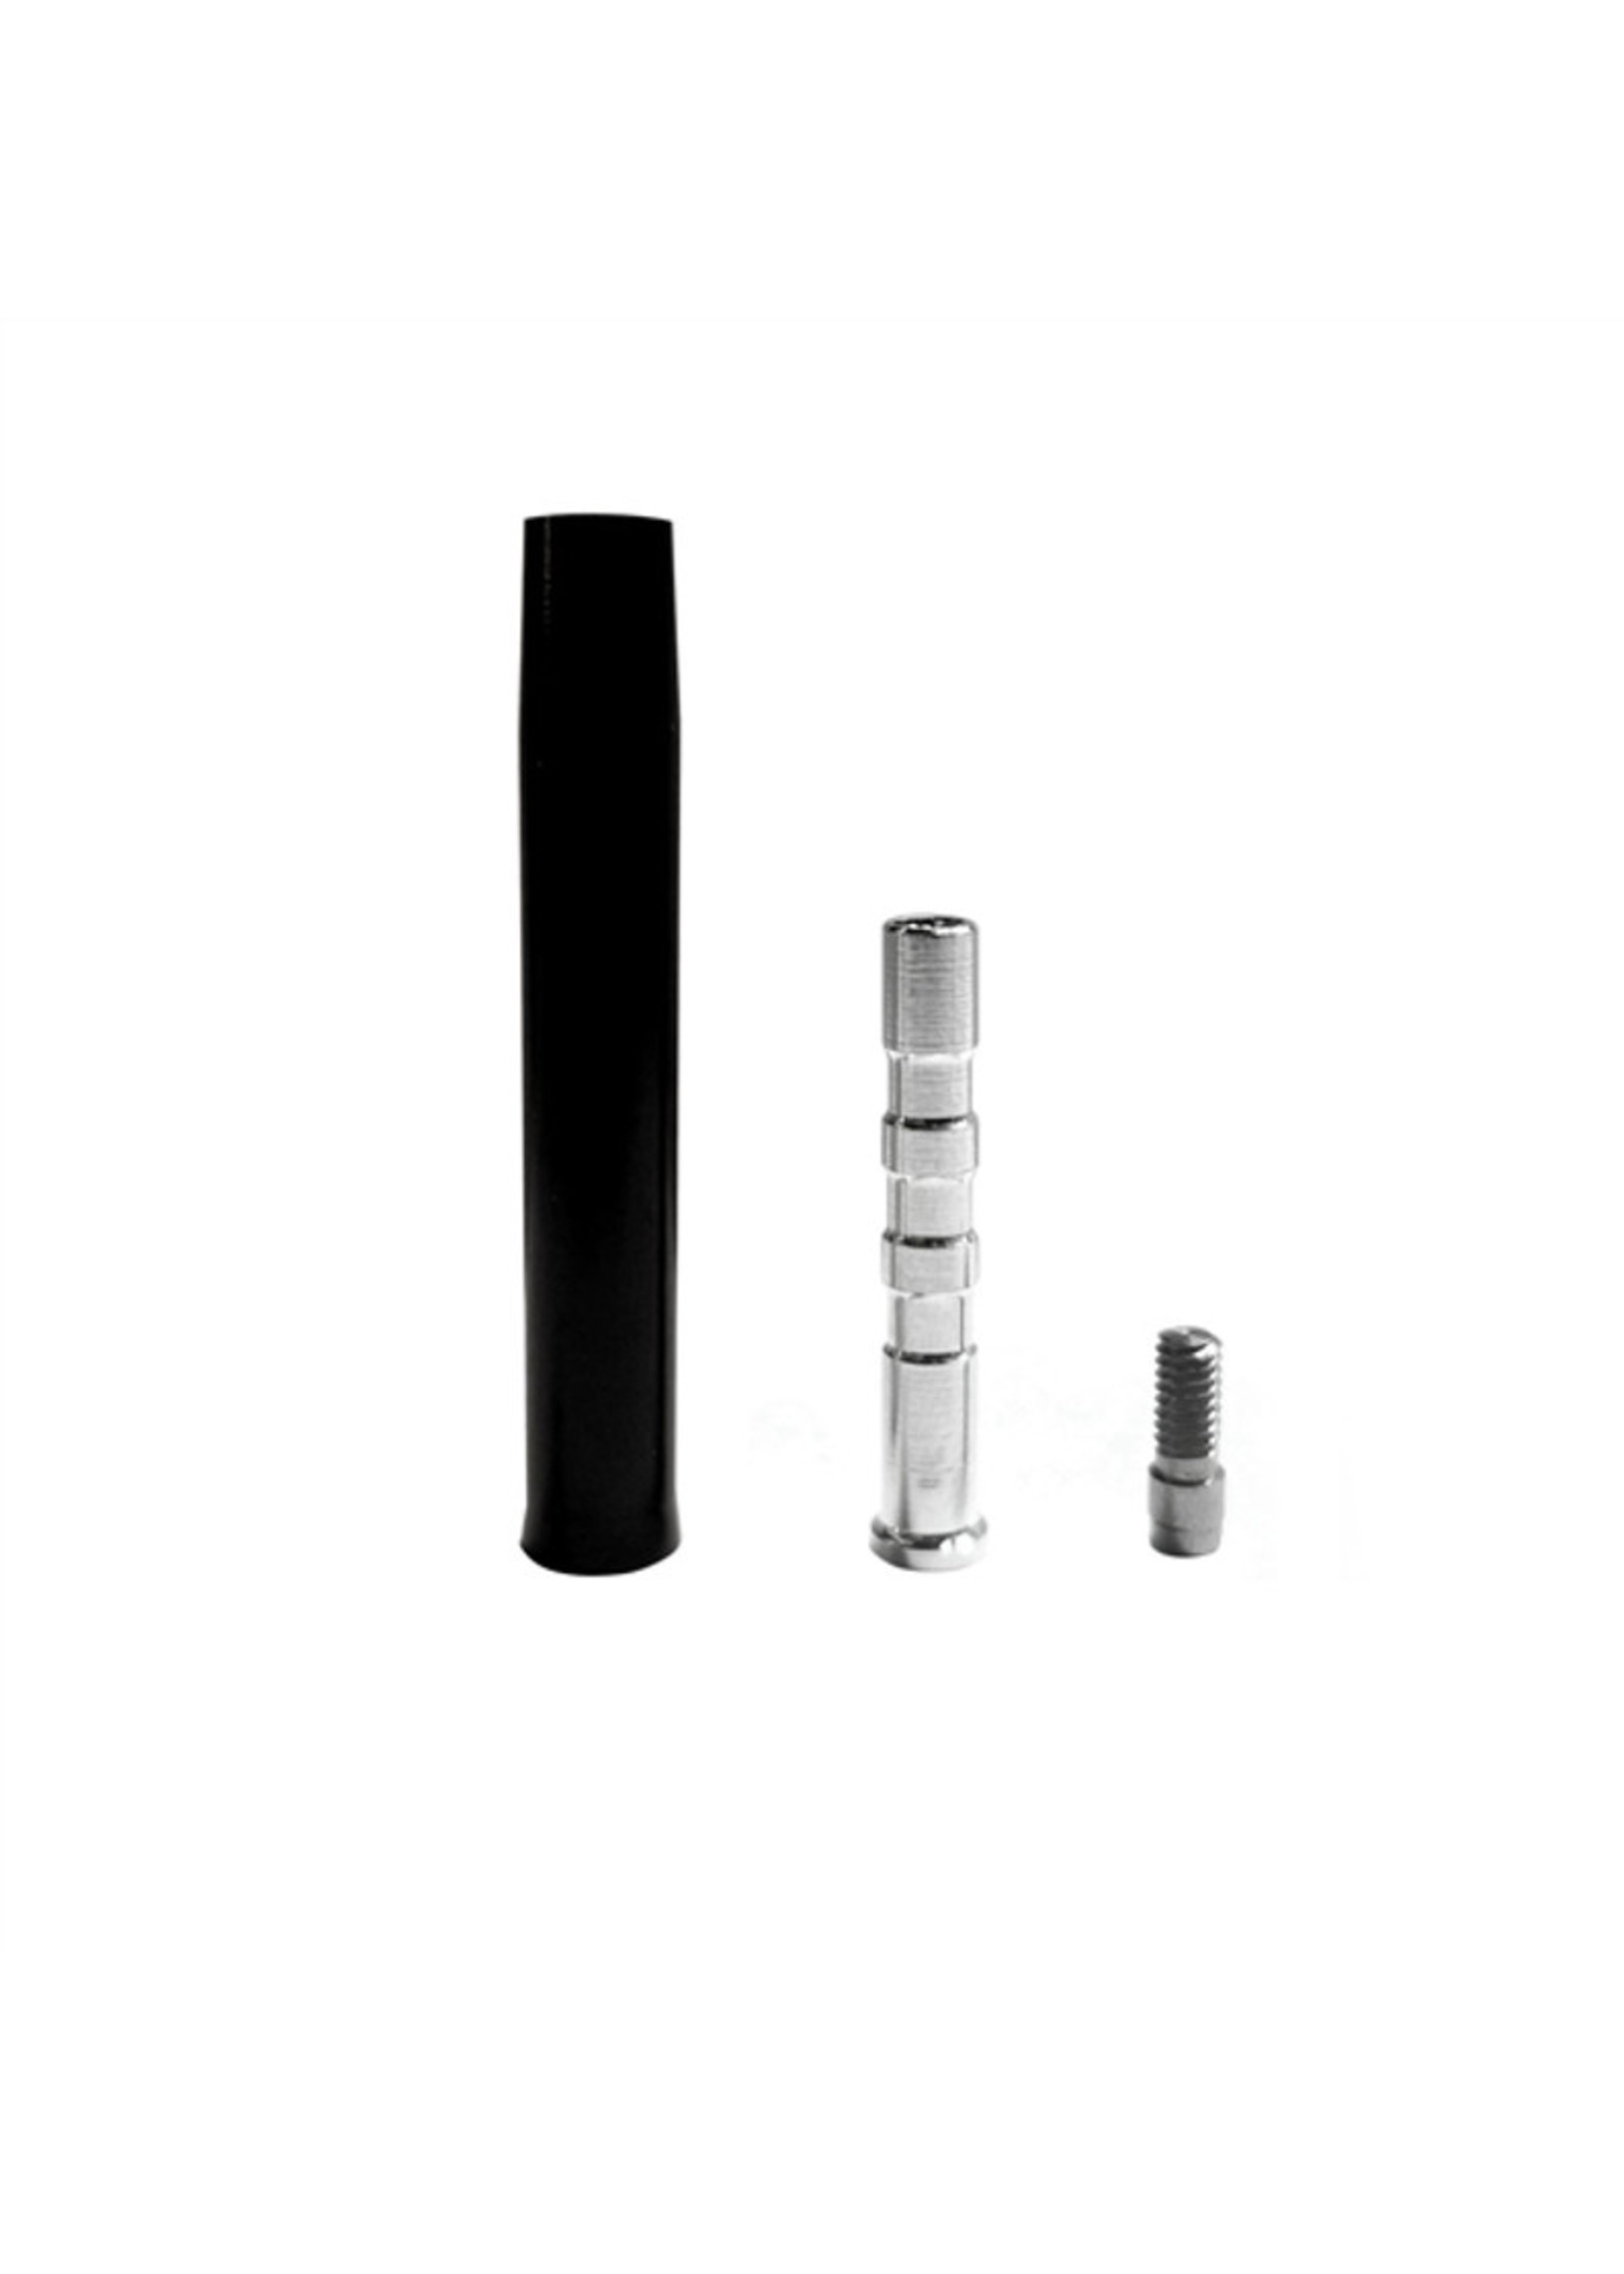
Our New Front Of Center Outsert System is designed for those that want more weight upfront and ease of use of Outserts. The F.O.C.O.S is made of 3 parts. One is a black anodized 7075 T6 aluminum alloy outsert. Two is a Stainless steel Retention post that also acts as a footer inside the shaft. The third part is the 3/32 allen head retention screw that allows for the Outserts to either be screwed on or screwed and glued. This system has been tested to over 550 Pounds per square inch of pull and they stay on! If you are looking for maximum penetration, Maximum F.O.C and shot after shot performance then the deadly combination of the Rampage arrows then the F.O.C.O.S is sure to be a hit!
Rampage COMPLETE Focus System Weighs 100 Grains:
Rampage F.O.C.O.S Outserts use FOCOS Brass Weights if you are adding extra weight
To install the F.O.C.O.S System
- Select the right outsert for the right shaft.
- Glue in Stainless steel retention Post
- Dry fitting is recommended on all components. Slide Outserts over shaft and spin test (if you prefer)
- If Outsert does not fit that is OK. Get some 100 Grit sand paper and lightly sand the shaft in a circular motion until the outsert fits fairly snug on shaft. Start slowly so you don't remove to much off the arrow.
- You should have approximately 3/4 of an inch insertion on Aluminum Outserts
- Wipe dust off of the shaft with Clean paper towel. (No Cleaners are recommended)
- Again, Spin test to ensure concentricity.
- Use a Silver or Black Sharpie and mark the Shaft and the Outsert for perfect alignment
- Slide outsert over shaft and use the 3/32 Head retention Screw and Lock the Outsert in place!
- If using glue See steps 11-15 .
- We have tested Our fletching glue, insert/outsert glue and epoxy and all of them work great.
- Apply a even amount of glue around the shaft to ensure you get enough glue in them to hold.
- Slide Outsert On shaft rotating to make sure Glue/Epoxy is evenly dispersed
- Use the 3/32 Head retention Screw and Lock the Outsert in place! Loctite Purple or Blue recommended
- Once The outsert is glued on Screw is installed stand the arrow on the nock end to dry.